68 oz x 6 Case - Micro Matic MM-B68 Alkaline Beer Line Cleaner - Heavy Duty Liquid Concentrate
$144.99$159.99Save 9%
 Skip to the content
Most foam complaints trace to one of four root causes: temperature drift, wrong pressure, dirty lines, or worn faucet seals. Diagnose in that order. You'll eliminate the cheap fixes first and never chase the wrong fault.
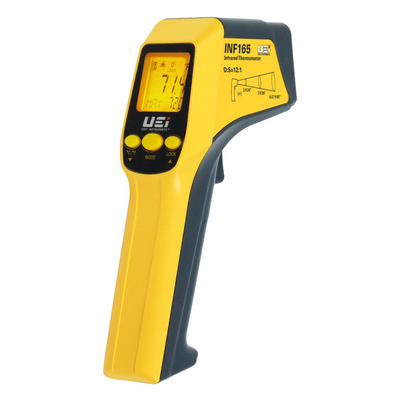
Beer should pour at 36–40°F at the faucet. Warmer than 40°F and CO₂ starts breaking out of solution before the beer hits the glass — every degree above target makes the foam exponentially worse.
Tool: infrared thermometer pointed at the spout right before the pour.
Every beer-style-by-temperature combination has a balanced CO₂ pressure. Most American lagers at 38°F want 10–12 PSI; British ales lower; nitro stouts use a 75/25 nitrogen blend at 28–32 PSI. If your gauge has drifted, the math is wrong from the start.
Tool: verify with a known-good test gauge or temporarily swap in a fresh regulator.
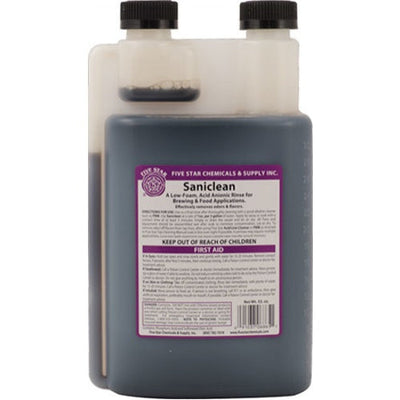
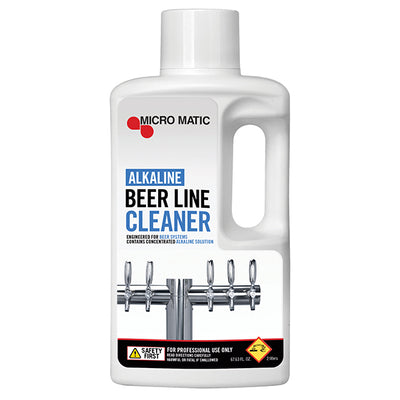
Beer lines build up biofilm — yeast and bacteria — over weeks. Biofilm creates microscopic nucleation sites where CO₂ breaks out of solution, so every pour foams. Clean lines should look glass-smooth on the inside.
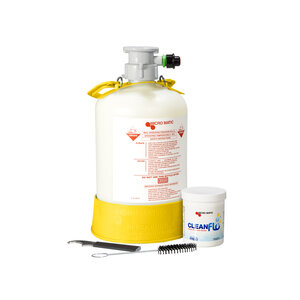
Tools: alkaline cleaner (kills biofilm), a low-foaming acid sanitizer (post-clean — high-foaming sanitizer leaves residue that contributes back to foam), and a pressurized cleaning vessel with a native D-system Sanke adapter so you can flush every line under working pressure without breaking the keg seal.
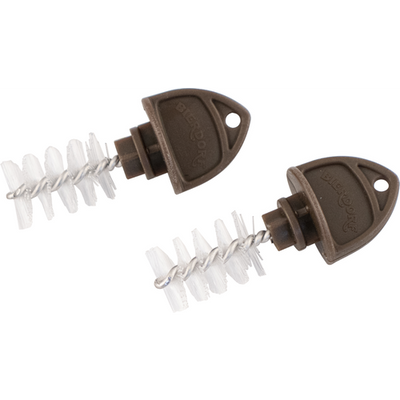
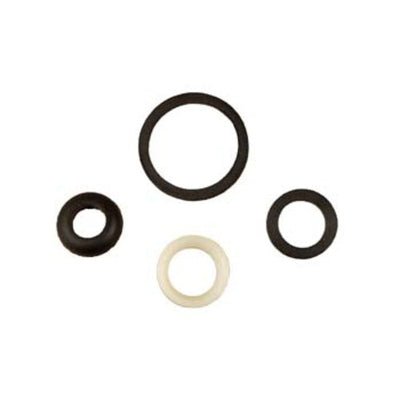
Faucet seals — the O-ring at the lever and the seat seal at the spout — harden and crack from constant CO₂ exposure and temperature cycling. Worn seals let air past during the pour. Air + beer = foam.
Tools: faucet brush set to physically clean, plus a rebuild kit. Most commercial faucets need a rebuild every 12–18 months under heavy use.
What's NOT in this kit but you may still need: a digital CO₂ test gauge (we don't currently stock a generic — call our techs and we'll spec one for your system) and replacement glycol if you're chasing a chiller fault.
Most foam issues resolve at Steps 1–3 alone. Step 4 is for when line cleaning doesn't fully clear the symptom.
Still foaming after working through this? Call us at 888-964-4239. We install draft systems for a living and usually diagnose by phone in five minutes.